Gutenberg templates provide a way to set a default layout for content types. It allows you to pre-populate the editor with a set of blocks, thus ensuring that there is a consistent structure to your content.
Template structure
Templates are defined via JSON, which are mapped directly to Gutenberg blocks. It can be a bit tedious, but pretty much all Gutenberg markup can be converted to JSON and vice-versa. Let's look at how Gutenberg markup is structured; for example, this is a paragraph with a custom class name:
<!-- wp:paragraph {"className":"custom-class-name"} -->
<p class="custom-class-name"></p>
<!-- /wp:paragraph -->
Here is how that paragraph would be represented as a JSON object:
[
  ["core/paragraph", {"className":"custom-class-name"}]
]
Note that in the JSON template, each Gutenberg block is represented as an array with up to 3 elements:
- The namespace/name of the block. The namespace for default Gutenberg blocks will always be "core", while the namespace for 3rd party/contributed blocks will vary (e.g. "bootstrap", "drupal", etc).
- A JSON object containing all the attributes of the block
- (Optional) - an array of nested Gutenberg blocks
On its own a single paragraph isn't super useful, so let's go over a more in-depth example.
Translating Gutenberg markup to JSON
For this example, we will set up a JSON structure with a header, separator, and paragraph, all wrapped in a container/row/column.
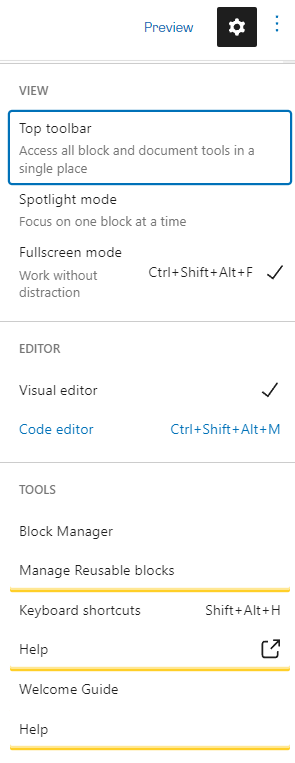
First things first, to access the Gutenberg markup press Ctrl+Alt+Shift+M, or click the 3 dots at the top right corner of the editor and select Code editor.
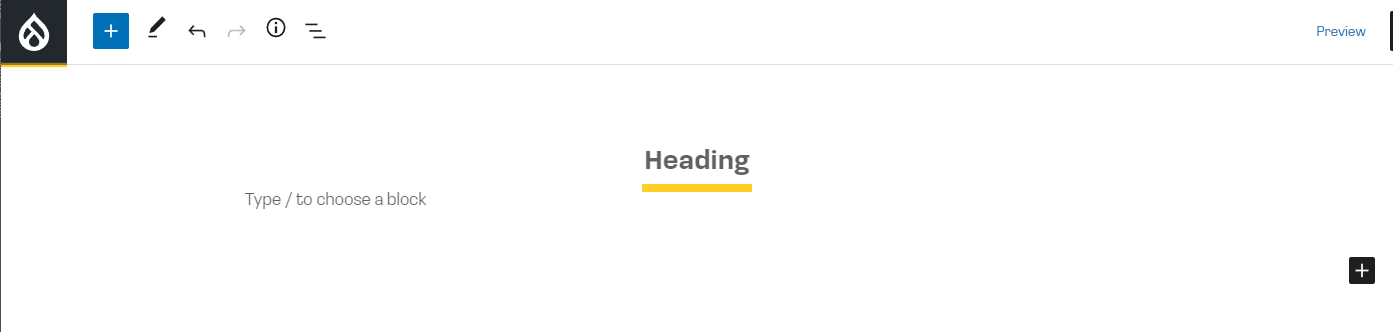
Here is an image of what our template will look like visually:
And here is what you will find in the code editor:
<!-- wp:bootstrap/container -->
<div class="alignwide container">

<!-- wp:bootstrap/row {"horizontalAlignment":"center"} -->
<div class="row justify-content-center">

<!-- wp:bootstrap/column {"sizeXs":12,"sizeLg":8} -->
<div class="col-12 col-lg-8">

<!-- wp:heading {"textAlign":"center"} -->
<h2 class="has-text-align-center"></h2>
<!-- /wp:heading -->

<!-- wp:separator -->
<hr class="wp-block-separator"/>
<!-- /wp:separator -->

<!-- wp:paragraph -->
<p></p>
<!-- /wp:paragraph -->

</div>
<!-- /wp:bootstrap/column -->

</div>
<!-- /wp:bootstrap/row -->

</div>
<!-- /wp:bootstrap/container -->
This looks complex, but it is pretty simple in structure. Each Gutenberg block consists of its constituent HTML tags that are wrapped in comments denoting the start and end of the block. Also embedded in the comments is JSON that stores all the attributes of that Gutenberg block.
So lets start converting the above markup to JSON beginning with the container:
[
  ["bootstrap/container", {}]
]
Note the HTML comment around the container
<!-- wp:bootstrap/container -->maps directly to the name in the JSON:
["bootstrap/container", {}]Now that we have our container, let's add the child row element to it:
[
  ["bootstrap/container", {},
    [
      ["bootstrap/row", {"horizontalAlignment":"center"}]
    ]
  ]
]
Note that the row is added inside of an array that is the third item in the parent container block. Compare the HTML comment for the row block
<!-- wp:bootstrap/row {"horizontalAlignment":"center"} -->with the JSON for the row block
["bootstrap/row", {"horizontalAlignment":"center"}]Notice here how you can simply copy/paste the JSON from the HTML comment directly into the JSON for the row.
Next we will add the column as a child of the row element:
[
  ["bootstrap/container", {},
    [
      ["bootstrap/row", {"horizontalAlignment":"center"},
        [
          ["bootstrap/column", {"sizeXs":12,"sizeLg":8}]
        ]
      ]
    ]
  ]
]
If you check the HTML comment around the column in the code editor, you will see that it maps directly to the JSON, just like the container and row.
Now that the bootstrap elements are set up, let's start adding the child blocks to our column:
[
  ["bootstrap/container", {},
    [
      ["bootstrap/row", {"horizontalAlignment":"center"},
        [
          ["bootstrap/column", {"sizeXs":12,"sizeLg":8},
            [
              ["core/heading", {"textAlign":"center"}],
              ["core/separator", {}],
              ["core/paragraph", {}]
            ]
          ]
        ]
      ]
    ]
  ]
]
You can see here that we've added a header, separator, and paragraph, all as direct children of the column block. Similar to patterns, there is no limit to how complex you can make your templates.
Adding the template to your content type
Now that we've created our JSON template, the last simple step is to add it to the content type. Edit the content type you want to add your template to, the scroll down to the Gutenberg Experience tab. You will see a text box here for "Template", which is where you will paste your JSON code. You can also choose to lock the template which will prevent site editors from modifying/removing the default blocks.
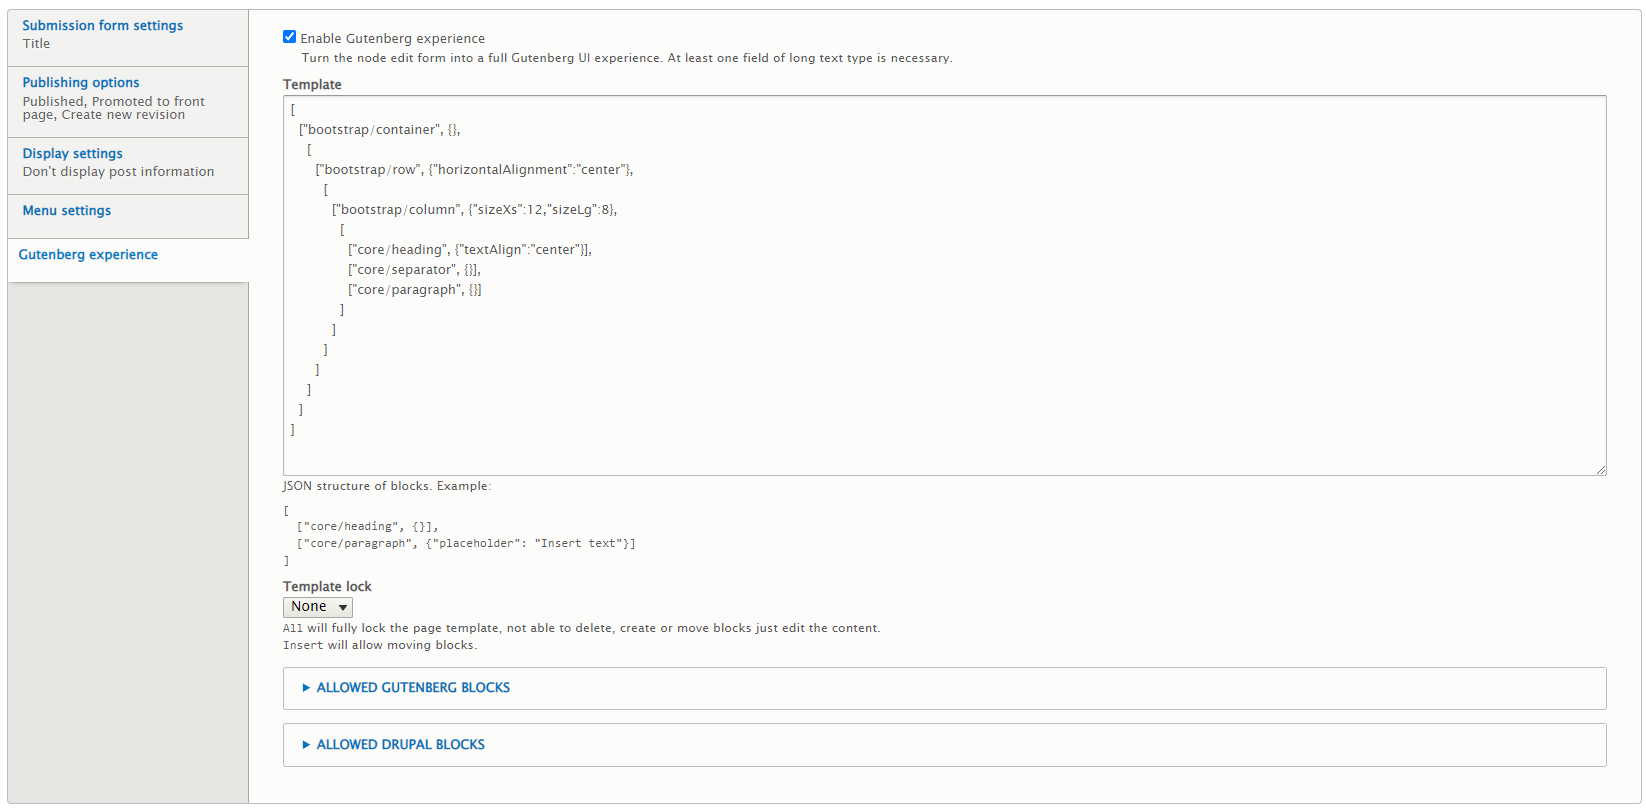
Click "Save content type" and then your pattern should immediately be available when you create new nodes!

In part 7, we will go over some tips and tricks to make using Gutenberg faster and more efficient.